


$2 Appetizers, $5 Well Drinks & Margaritas, $4 Domestic Draft Beer & Wine
Email Brookside Golf Club at [email protected]">gm@

1133 Rosemont Avenue | Pasadena, CA 91103
(626) 585-3594Get DirectionsBook a Tee TimeBook a Tee Timehttps://brooksidegc.com/
| Hole |
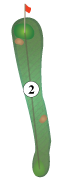
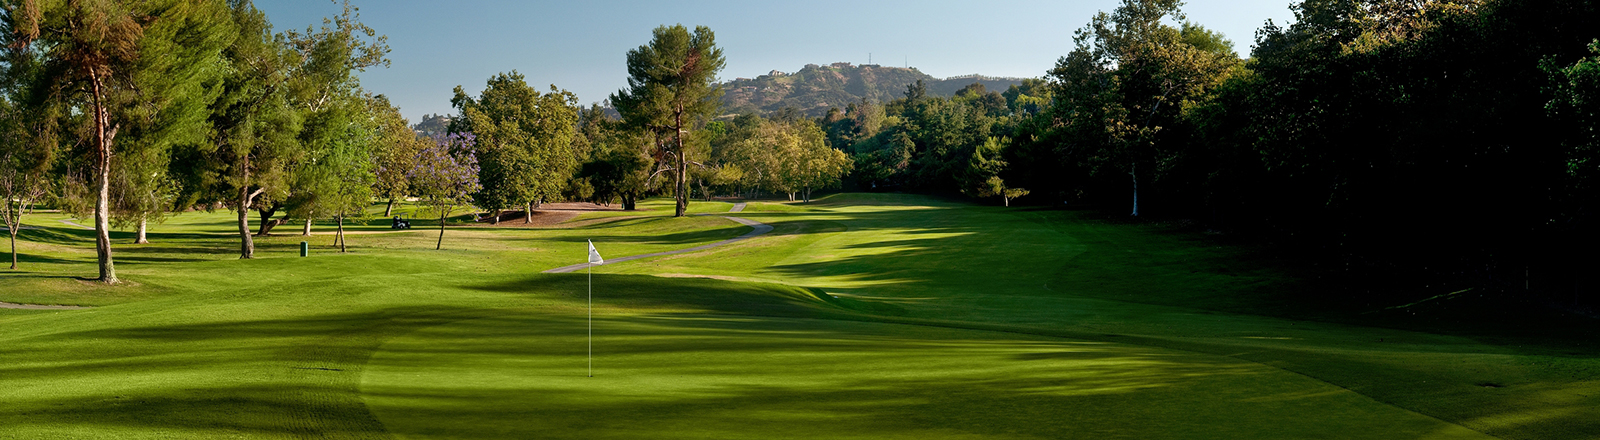
 Hole #3One of the most difficult par fours on the golf course, the third hole is a long uphill par four. Avoiding the fairway bunker on the left-hand side of the fairway will give you the best opportunity to reach this green in regulation. The large elevated green is guarded by two large bunkers. Front pin locations are the most challenging. Par is an excellent score on the third. |
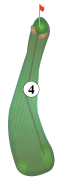 Hole #4A long sweeping dogleg right par four with out of bounds left and a grove of trees down the right side demands accuracy off of the tee. Two greenside bunkers and a ridge running perpendicular to the fairway protect this green. Any approach shots that are above the hole will leave extremely fast downhill putts. Do your best to leave yourself below the hole. |
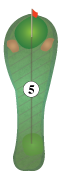
 Hole #5There are multiple options for your tee shot on the fifth. Laying up short of the fairway cross bunker is the most conservative. For the aggressive player, a heroic carry over the bunker down the right side of the fairway will leave you a short approach shot to this large steeply sloping green. |
 Hole #6The first and only par five on the front nine is a long sweeping dogleg left with a hazard running along the left side, and a fairway bunker down the right. If you elect to lay up, you must negotiate a bunker approximately 100 yards away from the green. The sixth green is a large subtle slopping surface back to front guarded by a green side bunker on its right. |
 Hole #7The tee shot on the seventh is one of the most challenging on the front nine. Mounding and a fairway bunker guard the left and a hidden waste bunker down the right make all the players thread the needle to find this fairway. The approach shot is also extremely challenging with bunkers both on the right and the left hand side of the green as well as a two tiered putting surface challenge players of all skill levels. | OUT |
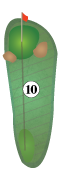
 Hole #10This elevated tee gives you a perfect view of this long downhill par four. Two large fairway bunkers protect both the right and left side of the landing area. The barranca and a large eucalyptus tree short of the green must be avoided to safely reach the green in regulation. The only flat portion of the green is in the back right corner and the most severe pin location is front left. |
 Hole #11A long narrow par five presents a nice scoring opportunity if you find the left side of the fairway off the tee. If you elect a layup you must pay attention to the bunker short left of the green some 30 yards away from the putting surface. This is the flattest green on the golf course with very subtle undulations. The green is slightly tilted from back to front. |
 Hole #12Length and accuracy are required for this long and demanding uphill par four. An accurate tee shot down the right center of this fairway presents the best opportunity to reach his green in regulation. A green side bunker as well as a ridge dividing the green into two sections also must be negotiated to score well on the 12th. |
 Hole #15Another scoring opportunity awaits you on the short par five15th. The best location for your tee shot is the left center of the fairway which gives you the best opportunity to go for the green in two shots. The fairway bunker 70 yards from the green must be negotiated if you are laying up. Two green side bunkers protect this green and the most difficult pin locations are on the back right plateau. |
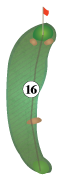
 Hole #16A medium length dogleg left par four framed by a large fairway bunker gives you a great target to aim at. The right edge of the fairway bunker is the ideal place to aim your tee shot. The green is pitched from back to front and you definitely will find trouble left and long of the 16th green |
 Hole #17A straightforward medium length par three with an extremely deep green. This hole usually plays downwind in the afternoons and almost always requires one extra club for pin locations on the back portion of the green. Be sure to avoid the large greenside bunker to the left and right of the surface. |
 Hole #18The 18th hole is one of the most challenging holes on the golf course. Extremely long uphill par four with out of bounds right and a grove of pine trees down the left require a precise tee shot down the center. The dramatic slope on the front of this green is one of the most difficult putting obstacles you will have seen all day. It's important that you always leave your approach shot below the hole on the 18th. | IN | TOT | Men's | Women's | ||||||
|---|---|---|---|---|---|---|---|---|---|---|---|---|---|---|---|---|---|---|---|---|---|---|---|
| Gold | 316 | 418 | 474 | 424 | 363 | 596 | 441 | 193 | 342 | 3567 | 422 | 559 | 506 | 202 | 374 | 528 | 421 | 181 | 468 | 3661 | 7228 | 74.8 / 134 | |
| Blue | 300 | 399 | 443 | 402 | 304 | 508 | 408 | 184 | 337 | 3285 | 408 | 503 | 468 | 182 | 355 | 495 | 403 | 169 | 443 | 3426 | 6711 | 72.9 / 130 | |
| White | 291 | 385 | 434 | 389 | 287 | 474 | 393 | 164 | 334 | 3151 | 394 | 463 | 455 | 157 | 339 | 476 | 376 | 158 | 420 | 3238 | 6389 | 71.1 / 127 | 77.1 / 131 |
| Handicap | 15 | 11 | 1 | 5 | 17 | 9 | 3 | 7 | 13 | 6 | 14 | 2 | 8 | 16 | 12 | 10 | 18 | 4 | |||||
| Par M/W | 4 | 4 | 4 5 | 4 | 4 | 5 | 4 | 3 | 4 | 36 37 | 4 5 | 5 | 4 5 | 3 | 4 | 5 | 4 | 3 | 4 | 36 38 | 72 75 | ||
| Red | 284 | 371 | 420 | 383 | 264 | 456 | 359 | 114 | 331 | 2982 | 402 | 439 | 421 | 140 | 313 | 459 | 351 | 140 | 353 | 3018 | 6000 | 74.9 / 128 | |
| Handicap | 15 | 7 | 5 | 1 | 13 | 9 | 11 | 17 | 3 | 6 | 4 | 10 | 16 | 14 | 2 | 8 | 18 | 12 |
| Hole |
 Hole #1The opening hole at the E.O. Nay course is a subtle dogleg right medium length par four. A fairway bunker protects the left side of the fairway and the green has both bunkers left and right. Take note that the back left portion of the green falls away and deflects approach shots that land past the center. |
 Hole #3A straightaway uphill par four is the best way to describe the third hole. A deep fairway bunker protects the right side of the landing area from the tee. The third green is one of the most severely sloped greens on the golf course. If it all possible, make sure your approach shot is below the hole to have any chance of scoring well on the third. |
 Hole #5The only par three on the front nine, the fifth hole has one of the largest greens on the golf course. Hole locations in the back portion of this green usually require an extra club off the tee to get close. Make sure you avoid the deep greenside bunkers on the right and left side to have the best opportunity to score well on the fifth. |
 Hole #6A short downhill par for with trees right and left requiring a straight tee shot to create a good scoring opportunity on this hole. A large bunker in the front portion of the green divides the surface into three different pin locations. The front left pin locations are by far the most accessible. The center pin locations are tricky to get close. Be careful not to over shoot the green on your approach shot. |
 Hole #7This short reachable par four is one of the easiest holes on the golf course. To fly the fairway bunker you must carry the ball approximate 220 yards. Two greenside bunkers protect the right portion of the green and the large putting surface has very subtle undulations that much you must take into account to post a good score. |
 Hole #8Another great scoring opportunity at the eigth. A short par four quite a bit more narrow than the seventh. Avoid the small fairway bunker on the right-hand side of the fairway. The elevated green is one of the most difficult to hold and often times approach shots that go long, make it almost impossible to get up and down. |
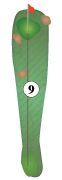 Hole #9An extremely subtle yet challenging medium length par four. The bunker down the left hand side should not come into play since the best angle the green is a tee shot that ends up on the right-hand side of the fairway. The ninth green is protected by a deep greenside bunker on the left and one of the back right. The green is deceptively tilted from back to front. | OUT |
 Hole #10The back nine starts off with a straightforward par three with greenside bunkers on the back right and front left. Not noticeable from the green but the back left portion of the green slopes severely away from the players. Any tee shots finding the front or middle portion of the green are well played. |
 Hole #11This extremely demanding tee shot starts off this narrow long uphill par five. Aim right of the large tree in the center of the fairway and avoid the grove of oak trees on the left hand side for your layup shot. The green is also long and narrow. The front portion is severely sloped from back to front. Once again make sure that your approach shot remains below the hole to give you the best opportunity to score. |
 Hole #13Without question one of the best medium length par fours you might ever play. The dog leg left blind tee shot must navigate out of bounds on the right side and the barranca that runs down the left. Normally a medium iron is required to attack the green. Check to see if the prevailing wind is into you . The green is pitched from back to front a relatively simple. Par is always a fantastic score on the 13th. |
 Hole #14Another straightforward short par four is a great scoring opportunity on the 14th. Avoid the fairway bunker down the left-hand side. The green is reachable by the longest players but a greenside bunker on the right-hand side makes you thread the needle to get there from the tee. The front of the green is steeply sloped. |
 Hole #15The shortest par three on the golf course at 125 yards doesn't seem to pose much of a threat to players from the tee. The only flat spot on the green is a small shelf tucked away in the back left-hand corner which is extremely difficult to get to. Front left pin locations are almost impossible to keep on the green. |
 Hole #16This is the shortest par five you might ever play. Fairway bunkers left and right require a precise tee shot to create a great scoring opportunity on this hole. Two green side bunkers left and right and a large eucalyptus tree protect the front portion of the green which is dramatically tilted from back to front. |
 Hole #17A demanding tee shot is required to start this narrow par four. Avoid the fairway bunker down the left hand side. The best tee shots are placed down the right center of the fairway which gives you the easiest approach angle to the green. A high lofted shot is required to land a ball safely on the green. The deep bunker in front of the green hides the majority of the putting surface. |
 Hole #18The home hole is a slight dogleg left par four with a fairway cross bunker on the left as well as to the right. Precisely place your tee shot down the center and you will have a great view of another large greenside bunker hiding the majority of the green. The most difficult pin locations are back right. Beware of the out of bounds that awaits for approach shots that fly the green. | IN | TOT | Men's | Women's | |||
|---|---|---|---|---|---|---|---|---|---|---|---|---|---|---|---|---|---|---|---|---|---|---|---|
| Back | 380 | 392 | 409 | 429 | 175 | 361 | 301 | 326 | 385 | 3158 | 169 | 548 | 176 | 396 | 271 | 127 | 449 | 365 | 387 | 2888 | 6046 | 68.9 / 122 | 74.9 / 131 |
| Middle | 362 | 380 | 390 | 420 | 159 | 350 | 291 | 311 | 370 | 3033 | 154 | 499 | 162 | 376 | 262 | 117 | 437 | 335 | 360 | 2702 | 5735 | 67.5 / 118 | 73.2 / 127 |
| Handicap | 3 | 5 | 9 | 1 | 11 | 7 | 17 | 15 | 13 | 12 | 2 | 14 | 4 | 16 | 18 | 10 | 6 | 8 | |||||
| Par M/W | 4 | 4 | 4 | 4 5 | 3 | 4 | 4 | 4 | 4 | 35 36 | 3 | 5 | 3 | 4 | 4 | 3 | 5 | 4 | 4 | 35 | 70 71 | ||
| Forward | 339 | 366 | 352 | 408 | 140 | 338 | 274 | 287 | 341 | 2845 | 147 | 481 | 136 | 365 | 249 | 109 | 405 | 301 | 339 | 2532 | 5377 | 70.9 / 124 | |
| Handicap | 3 | 1 | 5 | 13 | 15 | 7 | 17 | 11 | 9 | 12 | 2 | 14 | 4 | 16 | 18 | 8 | 10 | 6 |
$2 Appetizers, $5 Well Drinks & Margaritas, $4 Domestic Draft Beer & Wine
Email Brookside Golf Club at [email protected]">gm@
$2 Appetizers, $5 Well Drinks & Margaritas, $4 Domestic Draft Beer & Wine
Email Brookside Golf Club at [email protected]">gm@
$2 Appetizers, $5 Well Drinks & Margaritas, $4 Domestic Draft Beer & Wine
Email Brookside Golf Club at [email protected]">gm@
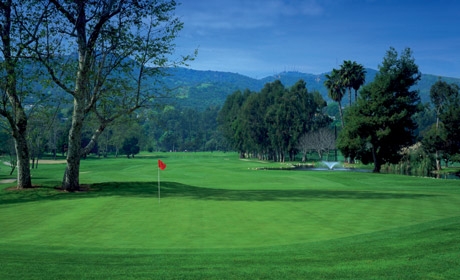

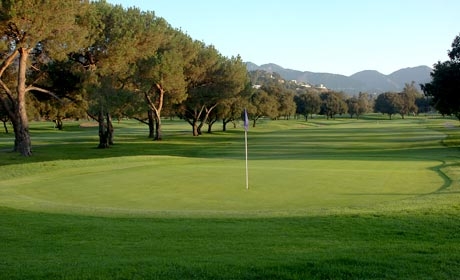

Brookside Golf Club is steeped in 75 years of golf tradition. Designed by famed golf architect William P. Bell, Brookside Golf Club's 36 holes are located in the foothills of Pasadena, a chip shot away from the world famous Rose Bowl. Brookside Golf Course has hosted many major championships including the Los Angeles Open and the National Public Links Championship. The two golf courses, the Koiner and the E.O. Nay, are both challenging and enjoyable to all levels of golfers, though the E.O. Nay golf course at Brookside is shorter in length, measuring 6,046 yards with tighter fairways and smaller greens. The Koiner Golf Course has been lengthened to 7,200 yards with wider fairways and fast greens. The course is conveniently located in Pasadena where the 210 and 134 freeways meet, and is easy to reach from anywhere in Los Angeles County.